If you’re ready to grow your own food or finally give your backyard some structure, there’s no better place to start than a raised garden bed. It’s a classic DIY project that hits the sweet spot: simple enough for beginners, valuable enough for pros. And if you build it right, it’ll last for years.
Why Raised Beds?
Raised beds offer better soil drainage, keep weeds at bay, and give you more control over what your plants grow in. They warm up faster in the spring, which means you can start planting earlier. They’re also easier on your back, and if you build them tall enough, they can double as a barrier against pests.
What You’ll Need
Materials:
- Lumber: Cedar is best (naturally rot-resistant), but pressure-treated wood is fine if you line the interior.
- Galvanized screws or exterior-grade wood screws
- Corner brackets (optional but recommended)
- Landscape fabric or hardware cloth (for weed/rodent barrier)
- Soil mix (see recipe below)
Tools:
- Drill
- Saw (hand saw, circular, or miter saw)
- Measuring tape
- Carpenter’s square
- Shovel or garden fork
Dimensions That Work
Standard size: 4 feet wide by 8 feet long, 12–24 inches high.
Why 4 feet wide? You can reach the center from either side without stepping in the bed—which compacts soil.
Step-by-Step Build
- Cut Your Wood: For a 4×8 bed, cut two 8-foot lengths and two 4-foot lengths. If you’re going for height, double them up or stack.
- Assemble the Frame: Use screws to secure the corners. Add corner brackets for extra strength.
- Level the Ground: Pick a sunny, flat spot. Level it out with a shovel so your frame sits evenly.
- Install a Base Barrier: Line the bottom with hardware cloth (for rodents) and/or landscape fabric (to block weeds).
- Fill with Soil: Use a mix like this:
- 50% topsoil
- 30% compost
- 20% peat moss or coconut coir Add some perlite for drainage and a slow-release organic fertilizer.
- Water and Plant: Water the bed thoroughly and let it settle for a day. Then plant your crops.
Tips for Durability
- Seal the wood: Use a non-toxic sealant to weatherproof the boards.
- Add a cap rail: A 2×6 board on top makes a comfy place to sit or rest tools.
- Cover in winter: Use a tarp or plant a cover crop to protect the soil.
Optional Add-Ons
- Trellis or tomato cage: Attach these for climbing plants.
- Cold frame lid: Extend your growing season.
- Drip irrigation: A soaker hose saves time and water.
Final Thoughts
A raised garden bed is more than a box of dirt. It’s a project that gives back every season. Take a weekend, build it strong, and enjoy fresh food and flowers right from your yard. Nothing store-bought compares. This is DIY that matters.
Next Up: Ready to turn kitchen scraps into garden gold? Don’t miss our guide to DIY composting for small spaces.
TrendPlain 16oz/470ml Glass Olive Oil Sprayer for Cooking – 2 in 1 Olive Oil Dispenser Bottle for Kitchen Gadgets and Air Fryer Accessories, Salad, BBQ - Black
$8.99 (as of March 16, 2026 06:49 GMT +00:00 - More infoProduct prices and availability are accurate as of the date/time indicated and are subject to change. Any price and availability information displayed on [relevant Amazon Site(s), as applicable] at the time of purchase will apply to the purchase of this product.)
3 PCS Egg Shell Opener Egg Separator for Raw Eggs,Hard Boiled Egg Peeler Egg Cube Egg Separator,Quickly Cutting Off Cooked Eggs,Stainless Steel Eggshell Breaker Kitchen Gadgets (3 pcs)
$9.99 (as of March 16, 2026 20:24 GMT +00:00 - More infoProduct prices and availability are accurate as of the date/time indicated and are subject to change. Any price and availability information displayed on [relevant Amazon Site(s), as applicable] at the time of purchase will apply to the purchase of this product.)
American Soft Linen Luxury 4 Piece Bath Towel Set, 600 GSM 100% Cotton Turkish Bath Towels for Bathroom, 27x54 in Large Bathroom Shower Towels, Dark Gray
$44.99 (as of March 16, 2026 20:24 GMT +00:00 - More infoProduct prices and availability are accurate as of the date/time indicated and are subject to change. Any price and availability information displayed on [relevant Amazon Site(s), as applicable] at the time of purchase will apply to the purchase of this product.)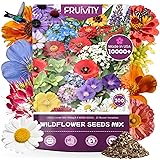
Wildflower Seeds Bulk 10000+, 1.06oz Butterfly Hummingbird Mix, 21 Variety Perennial Annual Mix, Non-GMO Heirloom Flower Seeds for Planting Outdoor Indoor, High Germination Rate Garden Seeds
$7.99 (as of March 16, 2026 20:24 GMT +00:00 - More infoProduct prices and availability are accurate as of the date/time indicated and are subject to change. Any price and availability information displayed on [relevant Amazon Site(s), as applicable] at the time of purchase will apply to the purchase of this product.)
March 15th Personalized Zodiac Candle | Inspirational Astrology Reading and Daily Affirmation for Your Birthdate | Handmade Pisces Candles | Astrology Birthday Gifts for Women
$45.95 (as of March 16, 2026 20:24 GMT +00:00 - More infoProduct prices and availability are accurate as of the date/time indicated and are subject to change. Any price and availability information displayed on [relevant Amazon Site(s), as applicable] at the time of purchase will apply to the purchase of this product.)
Cordless Woven Wood Roman Shades, Bamboo Shades Sizes 20 to 72 Wide and 24 to 72 High, Bamboo Mesh Natural
$69.99 (as of March 16, 2026 20:24 GMT +00:00 - More infoProduct prices and availability are accurate as of the date/time indicated and are subject to change. Any price and availability information displayed on [relevant Amazon Site(s), as applicable] at the time of purchase will apply to the purchase of this product.)