Stylish home updates—using stuff you were probably about to toss.
Upcycling is the ultimate win-win: you save money, reduce waste, and end up with something way cooler than anything store-bought. With a little creativity, junk becomes statement decor. Old becomes bold.
Here are four upcycled DIY projects that are easy to make, budget-friendly, and totally on-trend. If it’s sitting in your garage, junk drawer, or thrift haul—it might be your next favorite home accent.
1. Painted Glass Bottles → Designer-Look Vases
(Wine night leftovers = minimalist chic.)
You’ll need:
- Empty glass bottles or jars
- Baking soda + acrylic paint
- Sponge or brush
- Optional: twine, dried flowers, or spray paint
How to do it:
- Mix baking soda with acrylic paint to create a matte, textured finish.
- Clean and dry your bottles, then paint with a sponge or brush.
- Add second coats as needed for depth.
- Let dry, then style in clusters with dried stems or pampas grass.
Bonus move: Wrap the neck in twine or dip the base in contrasting paint for that high-end touch.
2. Old Picture Frames → Faux Gallery Wall
(Thrift store gold—just needs a little love.)
You’ll need:
- Mismatched picture frames
- Spray paint (matte black, gold, or white)
- Scrap fabric, printouts, or your own art
- Mounting tape or nails
How to do it:
- Remove glass and backing.
- Spray all frames the same color for a unified look.
- Add cool fillers—like old book pages, graphic printouts, or swatches of textured fabric.
- Arrange in a gallery wall layout (3×3 grid or asymmetrical clusters work great).
Why it works: Cheap, quick, and totally custom to your style.
3. Tin Cans → Lanterns or Pencil Holders
(Yes, your soup can has aesthetic potential.)
You’ll need:
- Empty tin cans, labels removed
- Hammer + nail (or drill)
- Paint (spray or acrylic)
- Tea lights or fairy lights (for lantern version)
How to do it:
- Fill cans with water and freeze—this helps keep their shape while you work.
- Use a nail or drill to punch patterns into the sides (think stars, lines, or random dots).
- Let the ice melt, dry thoroughly, then paint your cans.
- Use as lanterns with tea lights, or keep on your desk for pens, brushes, etc.
Pro tip: Metallic spray paint = instant glam.
4. Furniture Flips → Bold Statement Pieces
(From “meh” to “wait, where’d you get that?!”)
You’ll need:
- Old side table, chair, or cabinet (thrifted or from your own stash)
- Sandpaper
- Primer + paint
- Optional: new knobs, peel-and-stick wallpaper, contact paper
How to do it:
- Sand it down, clean it up.
- Prime if needed, then paint in bold colors (go for matte black, sage green, or mustard yellow—trendy AND timeless).
- Swap knobs for something fun (Etsy and Amazon are full of cute options).
- Line drawers or shelves with contact paper for a surprise detail.
Idea: Paint chunky checkers, arches, or abstract blobs if you’re feeling extra artsy.
Upcycling Tips for Maximum Style
- Spray paint is your best friend. Matte finishes instantly modernize almost anything.
- Don’t worry about perfection. A few dings and scratches add character.
- Keep a stash. Glass jars, cans, scrap wood—it’s all potential material.
- Look at shape, not color. If the form is good, the finish can always be changed.
From Trash Pile to Showstopper
Decor doesn’t have to be expensive—or new. Some of the best pieces come from what others toss out. With a few basic tools and a little vision, you can turn clutter into conversation starters.
So next time you’re about to throw something away, pause and ask: Can I make this awesome instead?
Spoiler alert: You probably can.
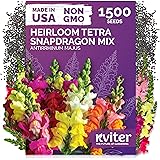
KVITER 1,500 Tetra Mix Snapdragon seeds (Antirrhinum Majus) – Heirloom & Organic Tall Snap Dragon Mix, Annual Flower Garden seeds, Cut Flower Seeds for Planting – Ideal for Outdoor Garden & Containers
$6.29 (as of March 16, 2026 06:49 GMT +00:00 - More infoProduct prices and availability are accurate as of the date/time indicated and are subject to change. Any price and availability information displayed on [relevant Amazon Site(s), as applicable] at the time of purchase will apply to the purchase of this product.)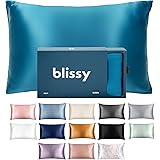
Blissy Silk Pillowcase - 100% Pure Mulberry Silk - 22 Momme 6A High-Grade Fibers - Silk Pillow Cover for Hair & Skin - Regular, Queen & King (Aqua, King)
$82.46 (as of March 16, 2026 20:24 GMT +00:00 - More infoProduct prices and availability are accurate as of the date/time indicated and are subject to change. Any price and availability information displayed on [relevant Amazon Site(s), as applicable] at the time of purchase will apply to the purchase of this product.)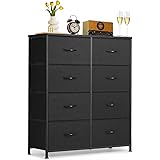
8-Drawer Dresser for Bedroom, Anti-Tip Tall Storage Organizer Chest of Drawers with Wooden Top and Metal Frame Fabric Bins for Closet, Living Room, Hallway, Entryway, Black
$37.16 (as of March 16, 2026 20:24 GMT +00:00 - More infoProduct prices and availability are accurate as of the date/time indicated and are subject to change. Any price and availability information displayed on [relevant Amazon Site(s), as applicable] at the time of purchase will apply to the purchase of this product.)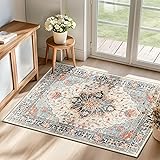
RELEANY Area Rugs 2'x3' Washable Non-Slip, Floral Vintage Distress Print Pattern Medallion Carpet for Living Room Bedroom Dining Room, Beige Navy Blue Orange Colorful
$17.09 (as of March 16, 2026 20:24 GMT +00:00 - More infoProduct prices and availability are accurate as of the date/time indicated and are subject to change. Any price and availability information displayed on [relevant Amazon Site(s), as applicable] at the time of purchase will apply to the purchase of this product.)
71.2''H Storage Shelves, 2500lbs Garage Shelving,Adjustable Heavy Duty Shelving Unit,5T Tall Garage Shelves,Metal Standing Shelf Units,Utility Rack For Kitchen Warehouse Industrial Basement 71*35*16
$40.49 (as of March 16, 2026 20:24 GMT +00:00 - More infoProduct prices and availability are accurate as of the date/time indicated and are subject to change. Any price and availability information displayed on [relevant Amazon Site(s), as applicable] at the time of purchase will apply to the purchase of this product.)
BrüMate Era Flip 40oz Tumbler with Covered Flip Down Straw | 100% Leakproof Insulated Tumbler | Made of Stainless Steel | Cup Holder Friendly Base | 40oz (Lilac Dusk)
$47.99 (as of March 16, 2026 20:24 GMT +00:00 - More infoProduct prices and availability are accurate as of the date/time indicated and are subject to change. Any price and availability information displayed on [relevant Amazon Site(s), as applicable] at the time of purchase will apply to the purchase of this product.)